In order to logon to an EWS session using OAuth you will need to register your application with the Azure Active Directory. You can use the following steps to do this:
Generating a Client ID
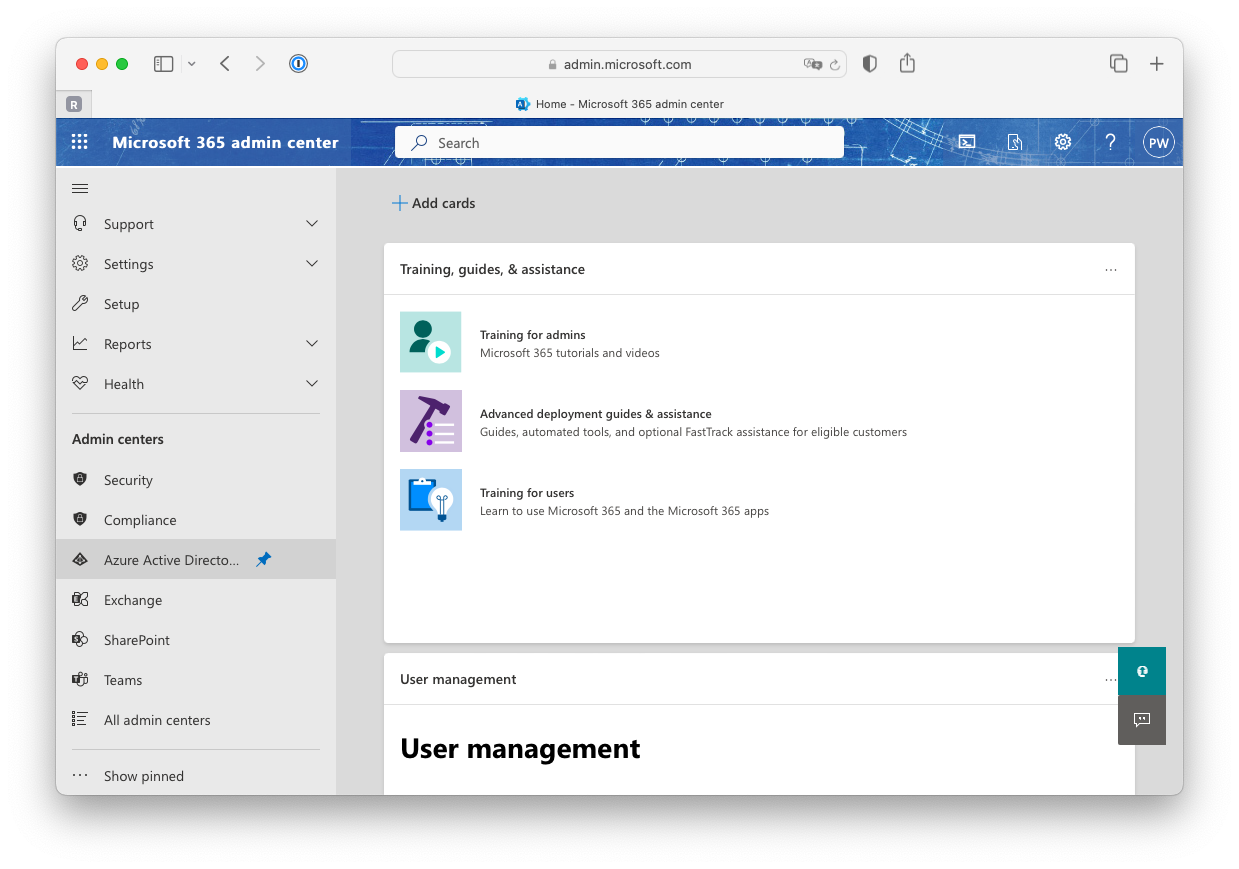
1) Logon to the Microsoft 365 admin center 2) When logged on look for the "Azure Active Directory" and open this page
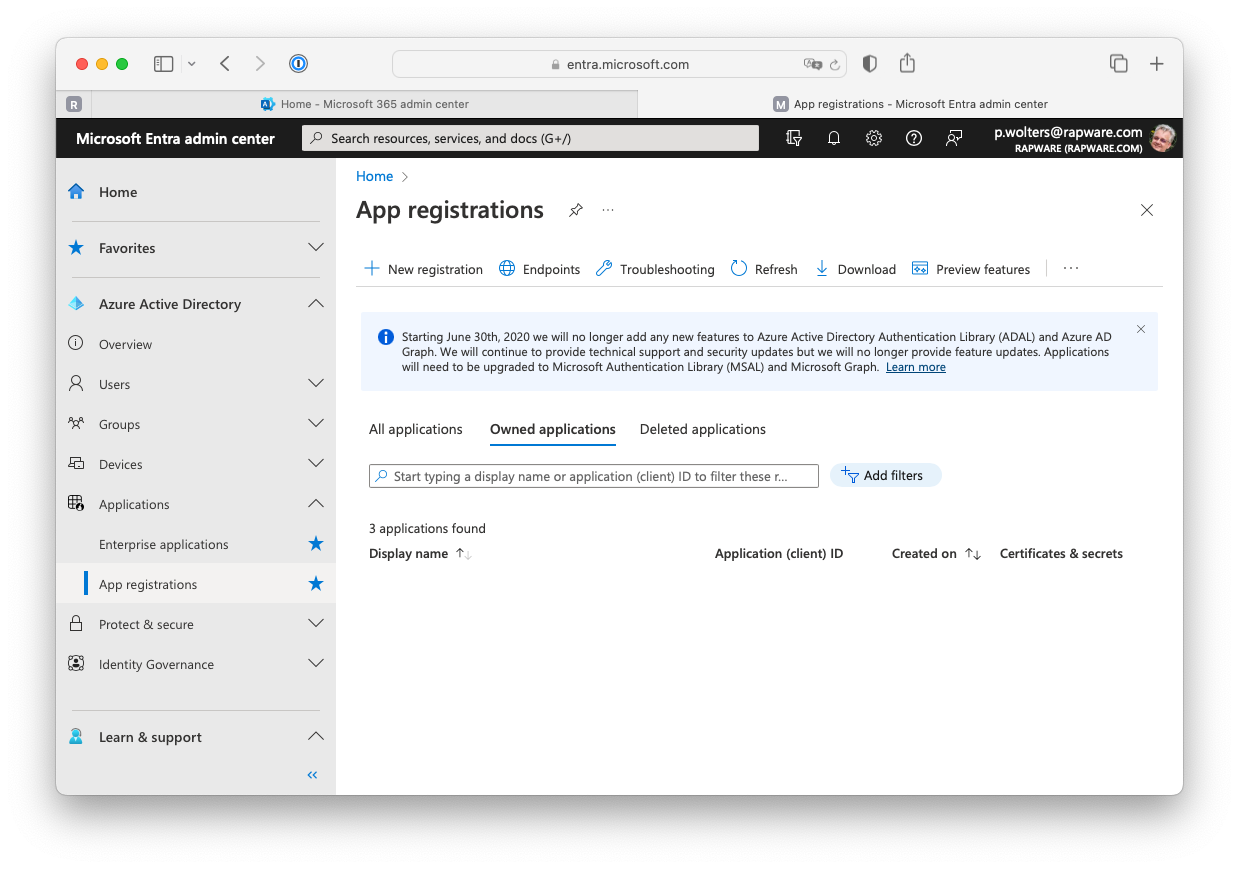
3) Search for the "App registrations" service and open it
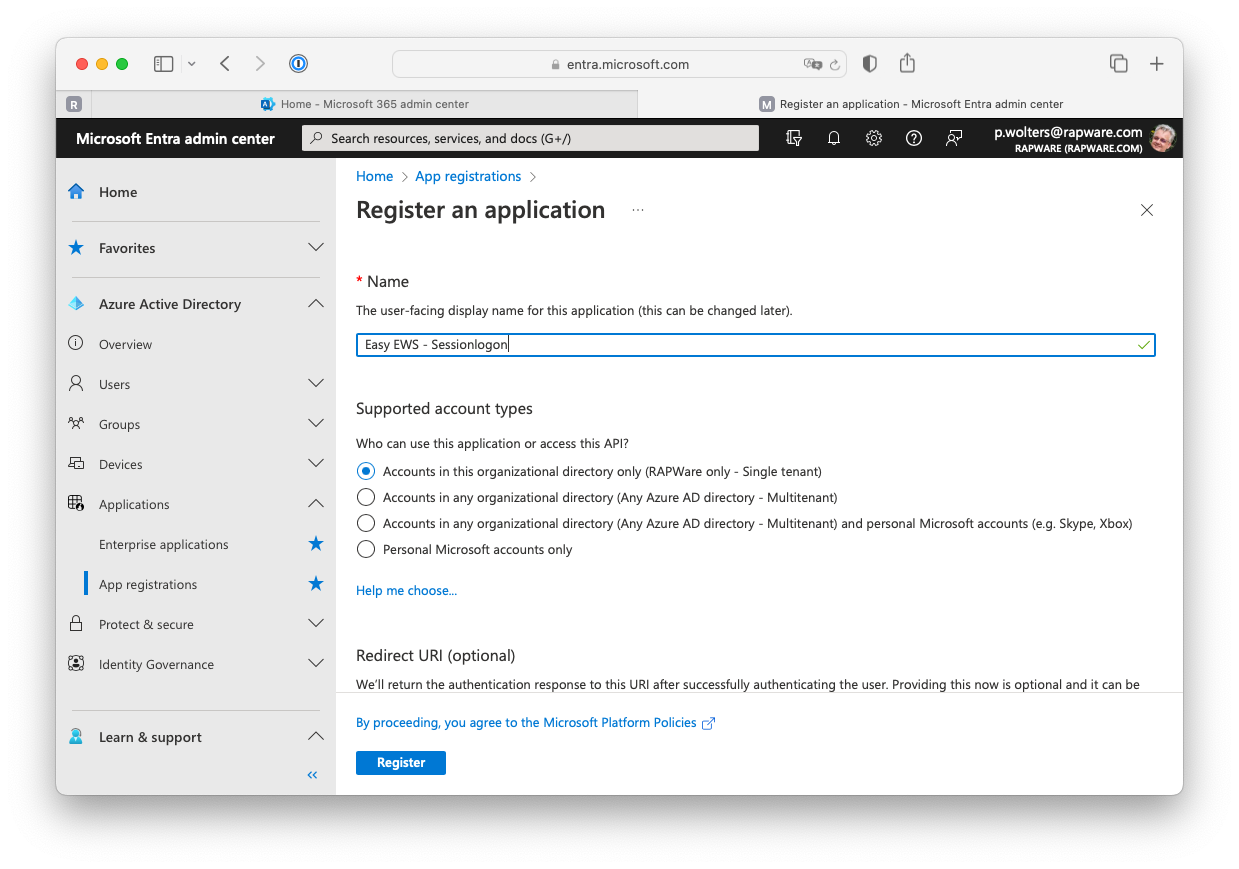
4) Press the "+ New registration" to create a new registration. Specify a displayname, select the account type and press "Register" to register the application. If you are planning to use the "Authorization Grant" you can also already specify the "Redirect URI" at this state. You can also update/change or add this later.
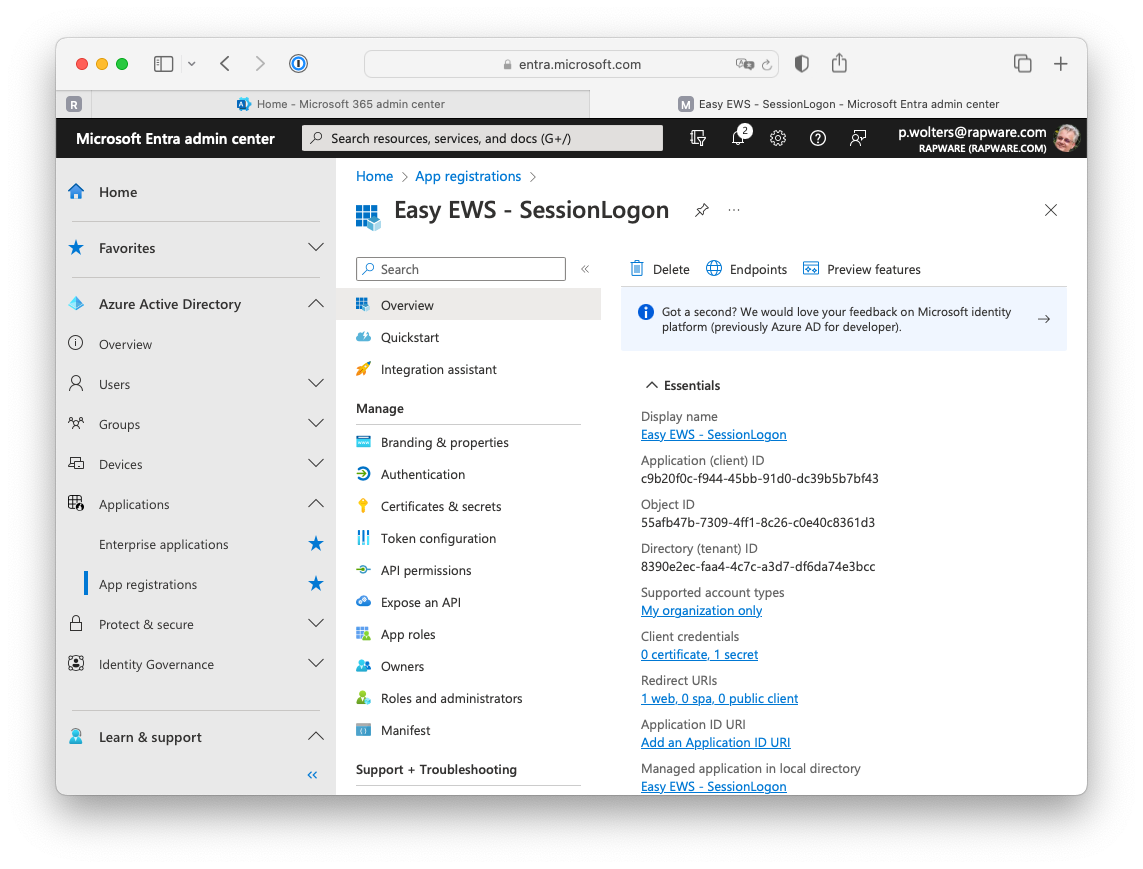
5) The app page contains an overview of the app you just registered. Locate the "Application (client) ID" and copy the value. You will need this in your EWS application.
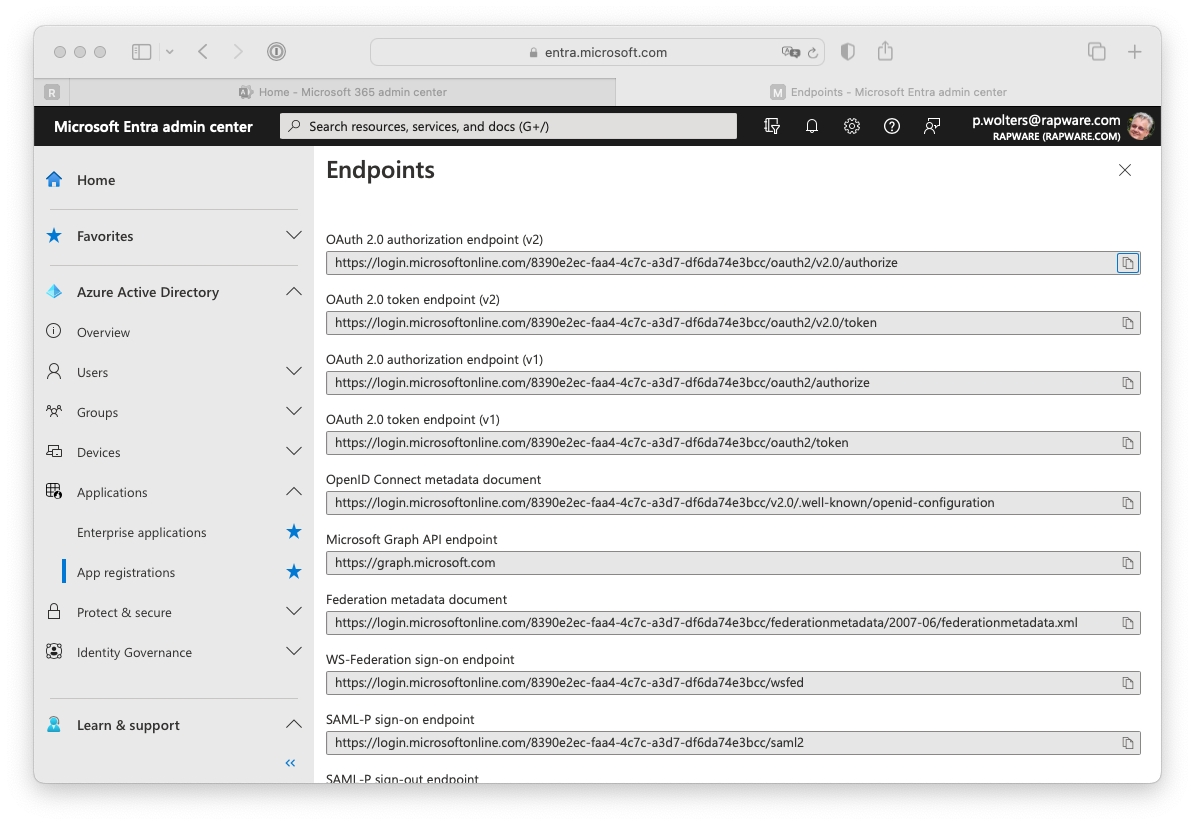
6) You can click on the "Endpoints" to get an overview of all the endpoints for your newly registered application. Only the first two endpoints (the authorization and token endpoint) are interesting. You can copy these values as well as you will need those in your EWS application as well.
Creating a Client Secret
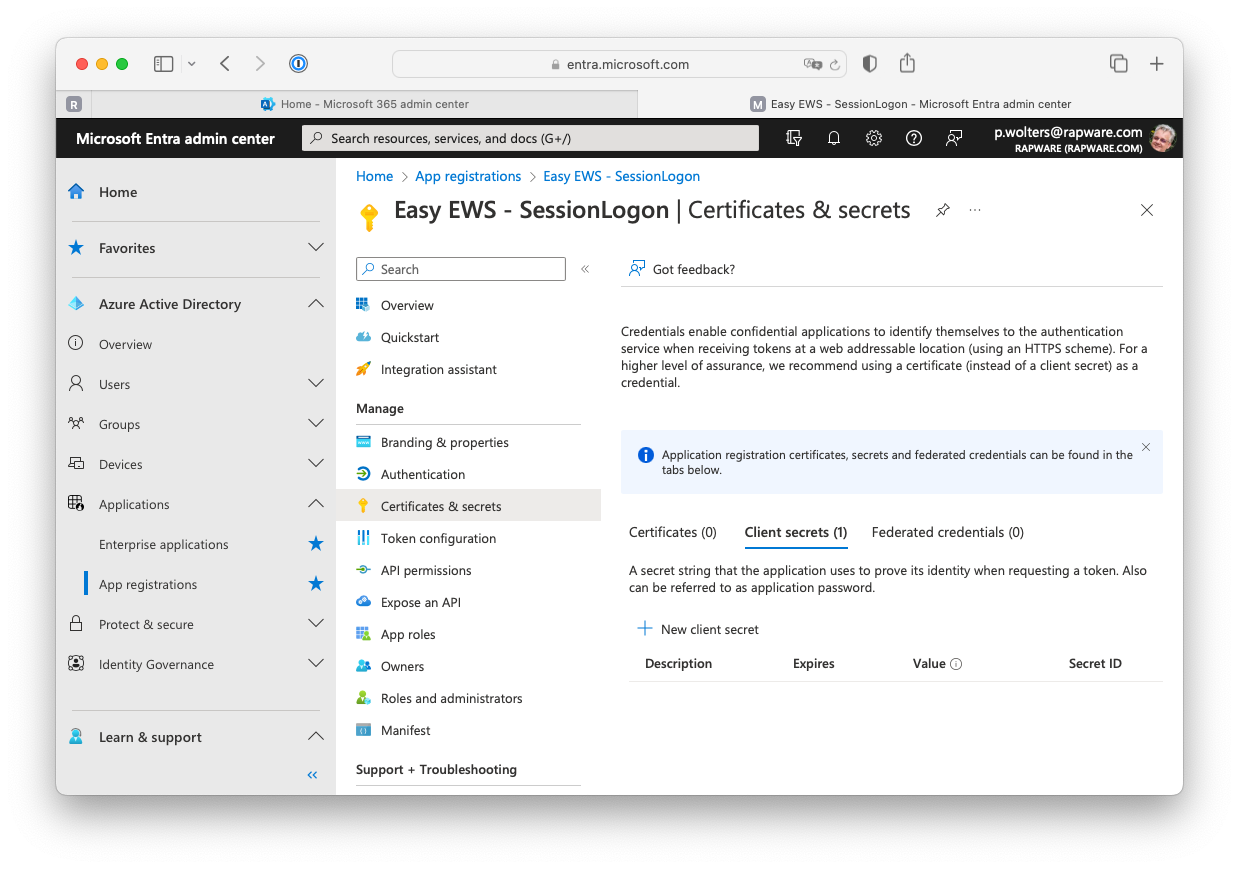
7) Besides a "Client ID" you will also need a "Client Secret" (=password) to logon. In order to create a client secret you must select the "Certificates & secrets" page from the menu on the left hand side.
8) Press "+ New client secret" to create a new secret.
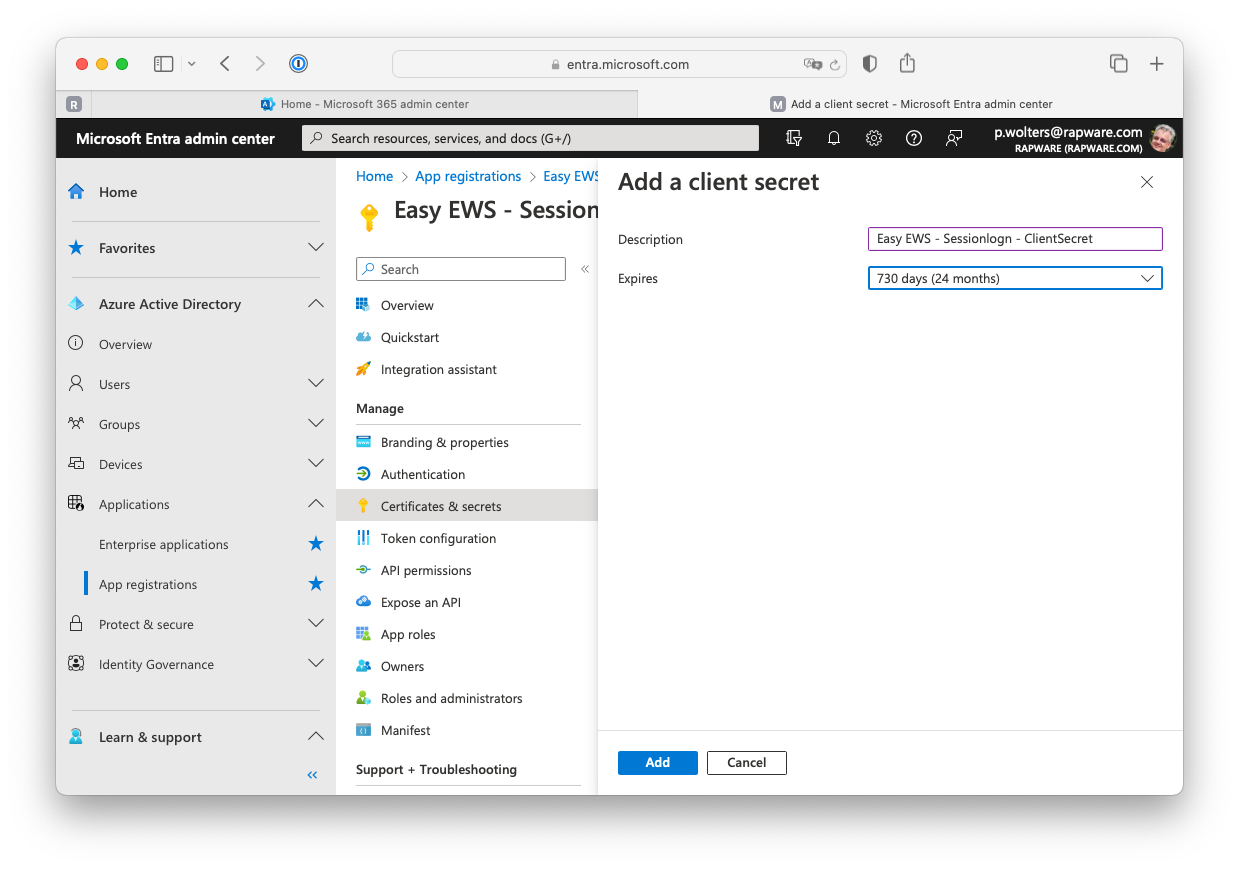
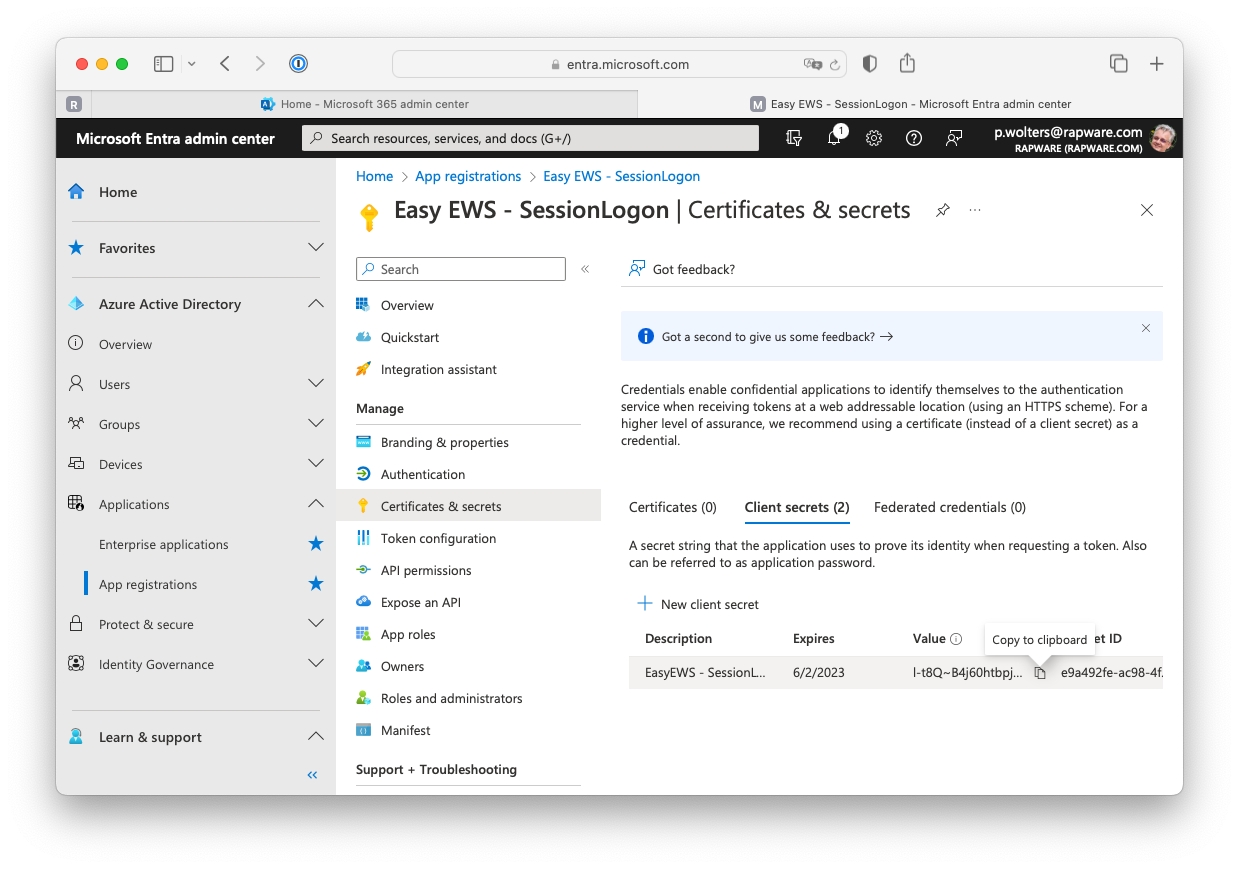
9) Specify a description for your secret and specify when you want it to expire. Finish by pressing "Add". A new secret (password) is now created. Copy the value and store it somewhere safe (password manager?). You will not be able to retrieve the value later!!!
Setting up Permissions
10) After having created a client id and secret you must set the correct API Permissions. You can do this by selecting the "API Permissions" in the menu on the left hand side.
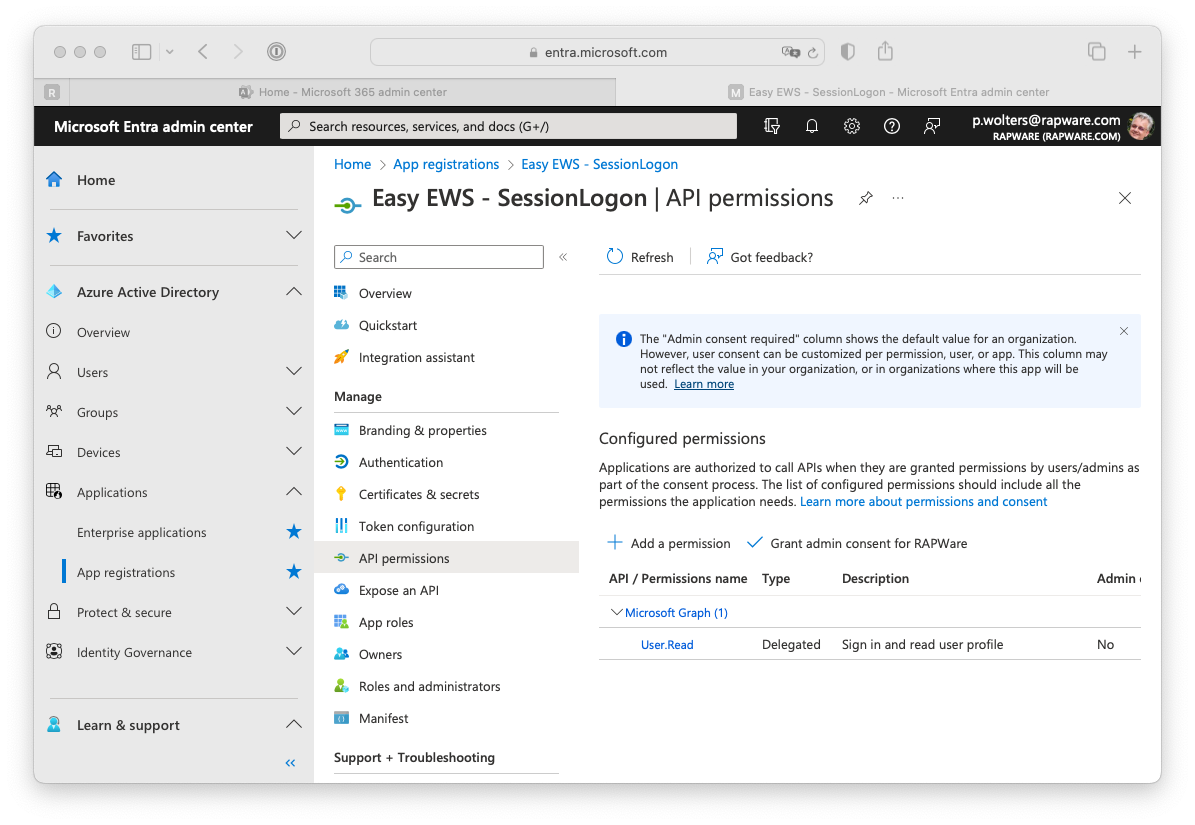
11) Press the "+ Add a permission" to specify the permissions your app needs.
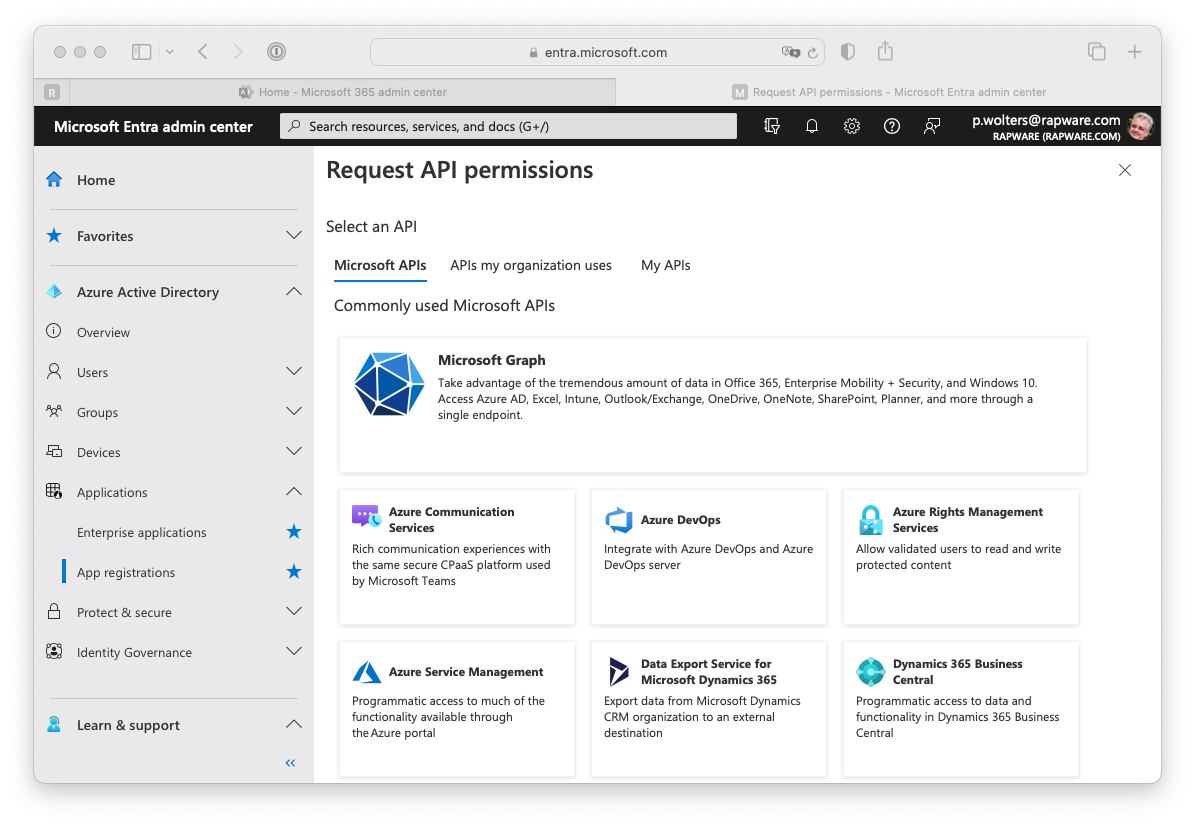
Delegated permissions
12) Depending on your type of application, and type of grant used, you can add either "Delegated permissions" or "Application permissons". Off course you can also setup both. The delegated permission will allow your application to act on behalf of the logged on user. This is used for the "Authorize" and "Password" grant. In order to select this permission you can press the "Microsoft Graph" button, select the "Delegated permissions" and type "EWS" in the search box.
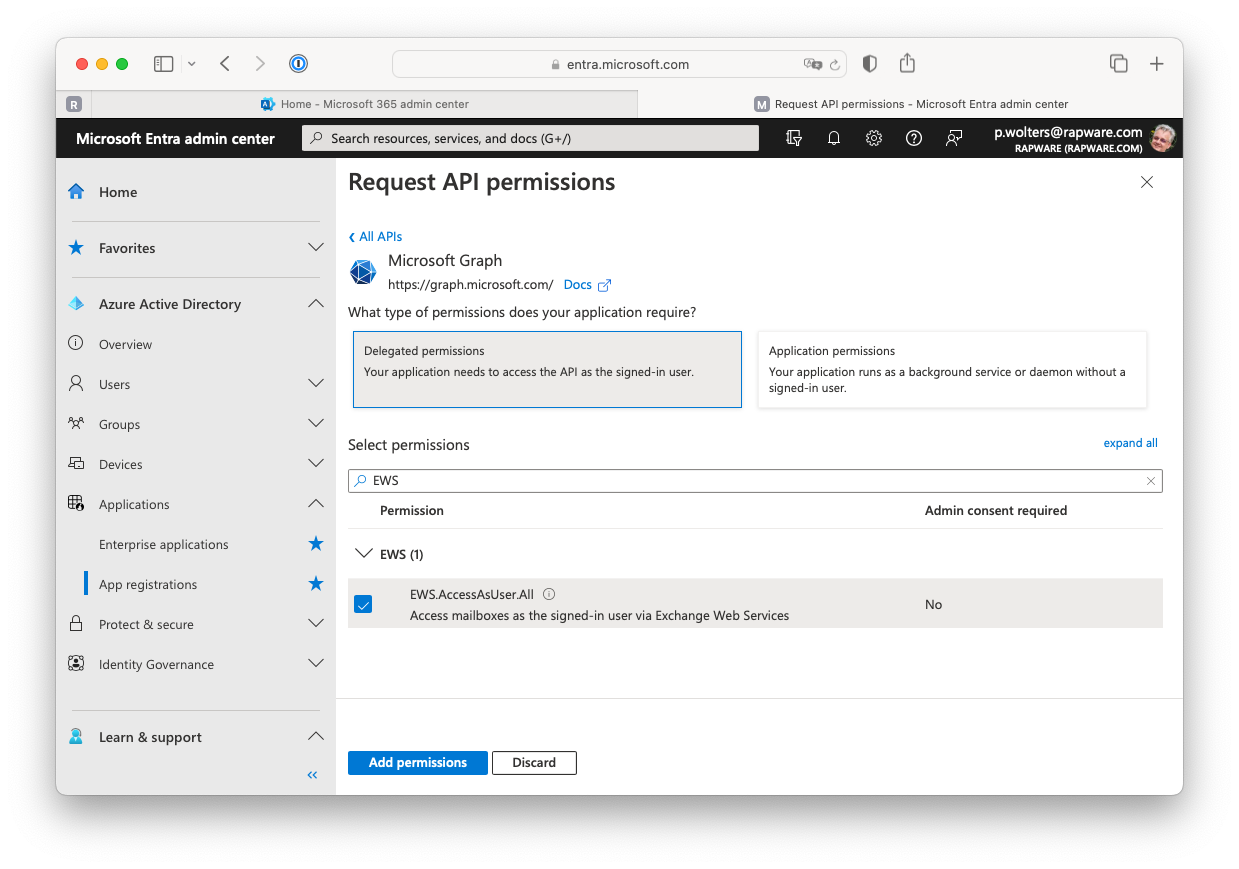
13) Select the "EWS.AccessAsUser.All" permission and add it using the "Add permissions" button.
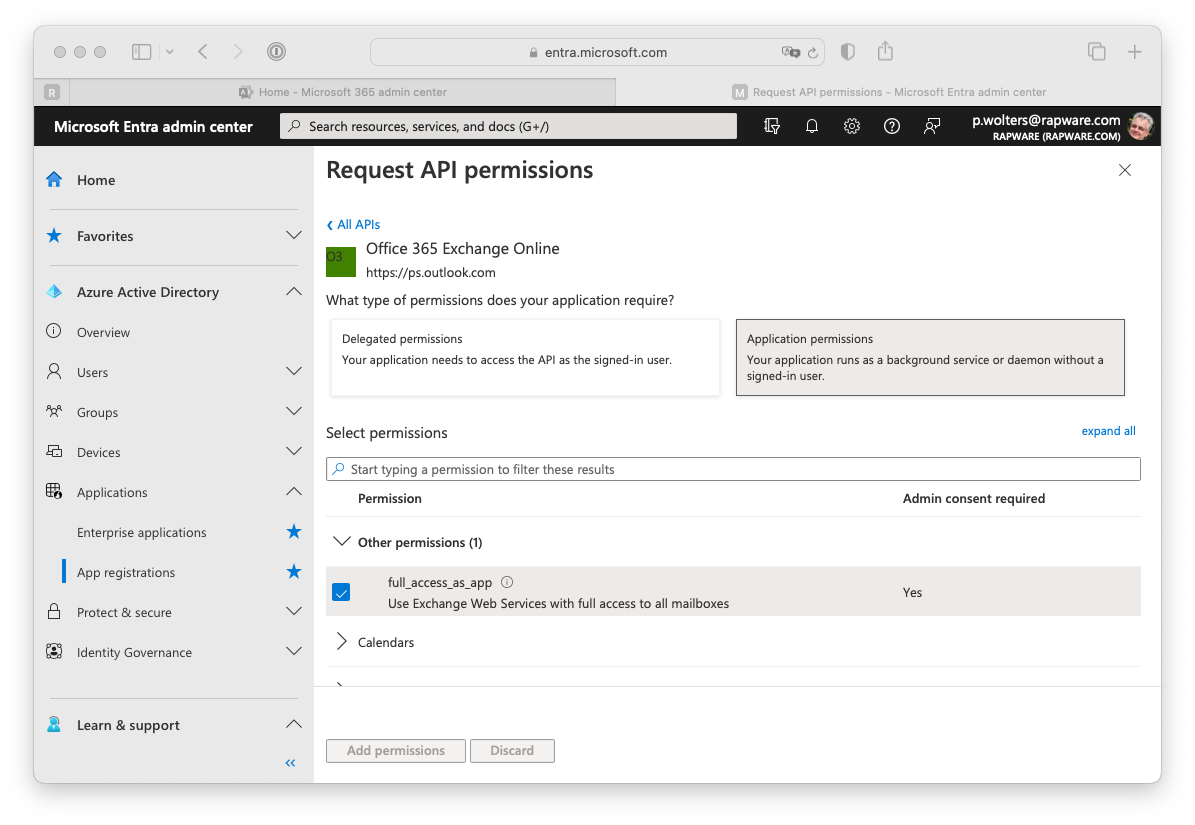
Application permissions
14) In order to add the "full_access_as_app" application permission, needed for the ClientCredentials grant, you must select the "APIs my organization uses" tab and search for "Office 365 Exchange".
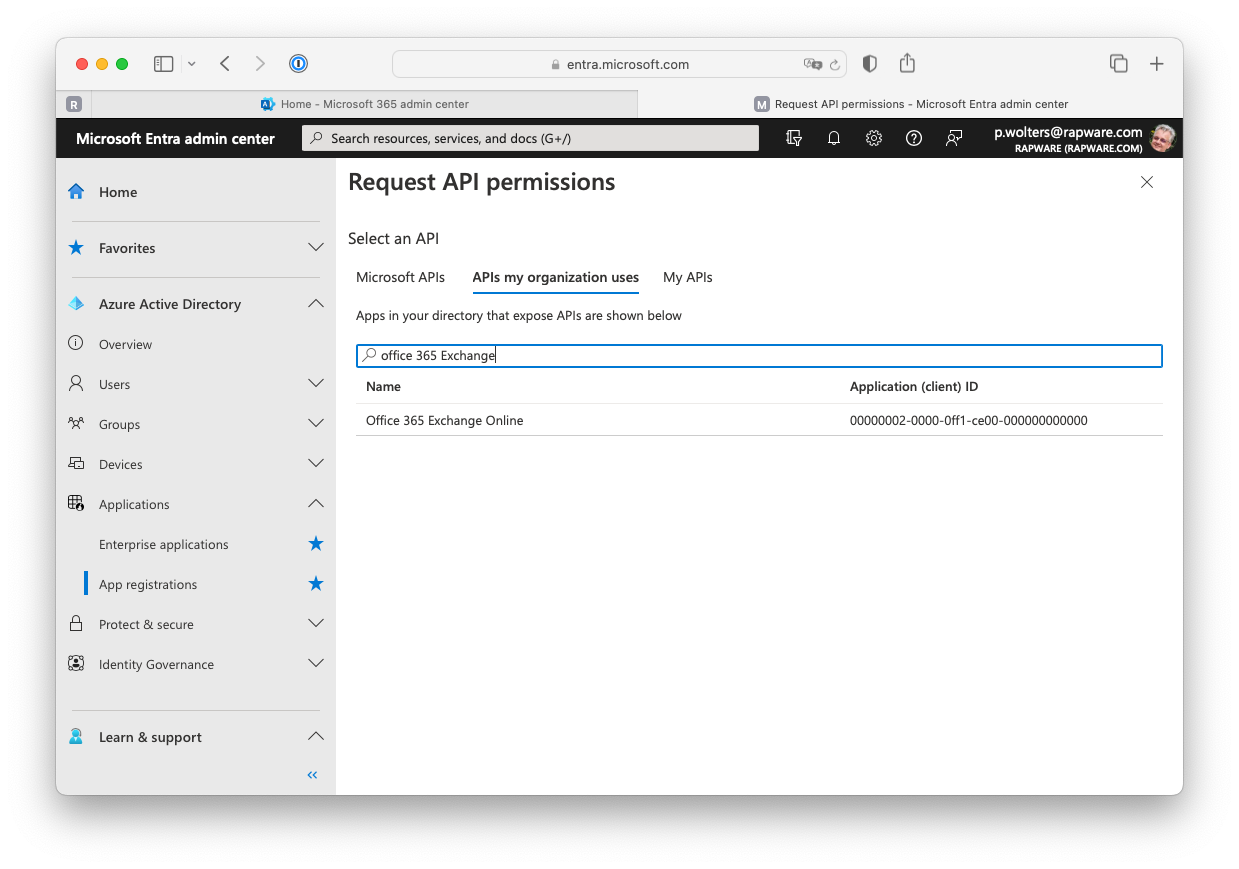
15) Select the presented "Office 365 Exchange Online" and Select the "full_access_as_app" permission. Then add it using the "Add permissions" button.
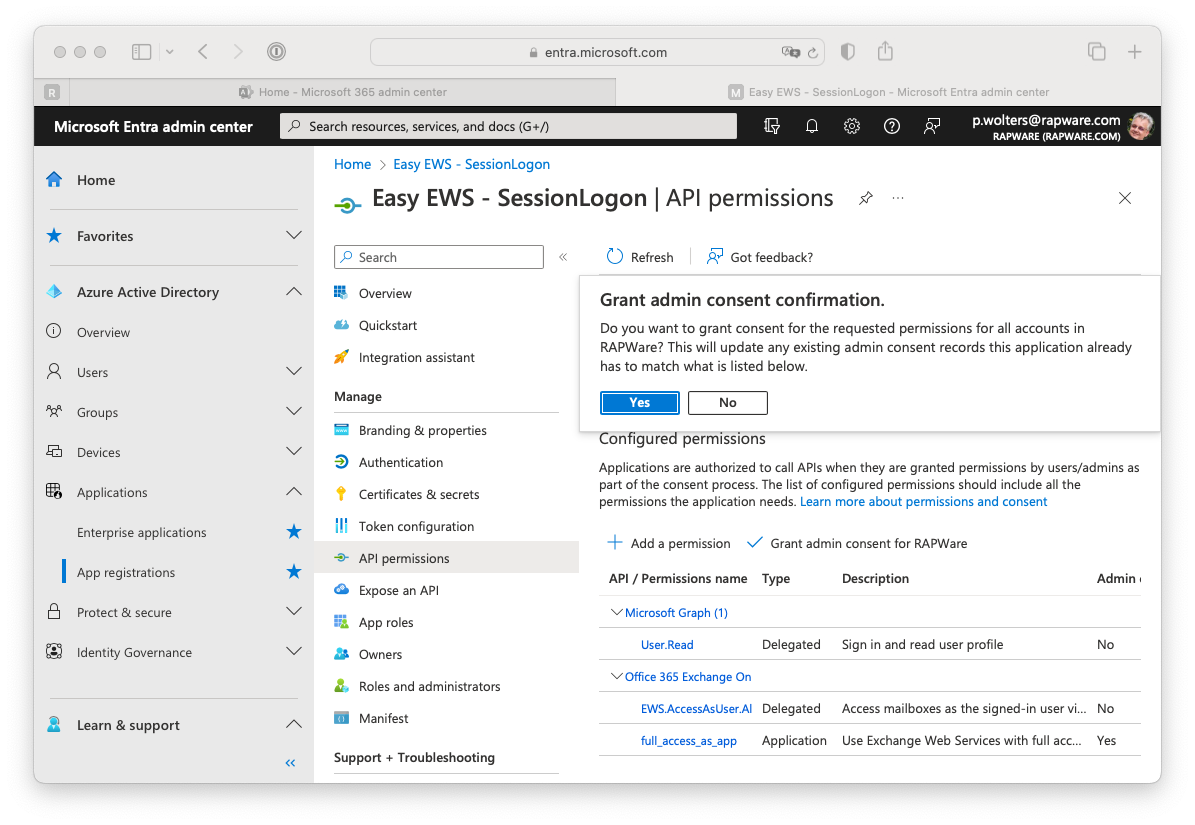
16) After having added the permission you can grant consent to your application for all users at once. If you don't do this you will be asked for permissons the first time you logon.
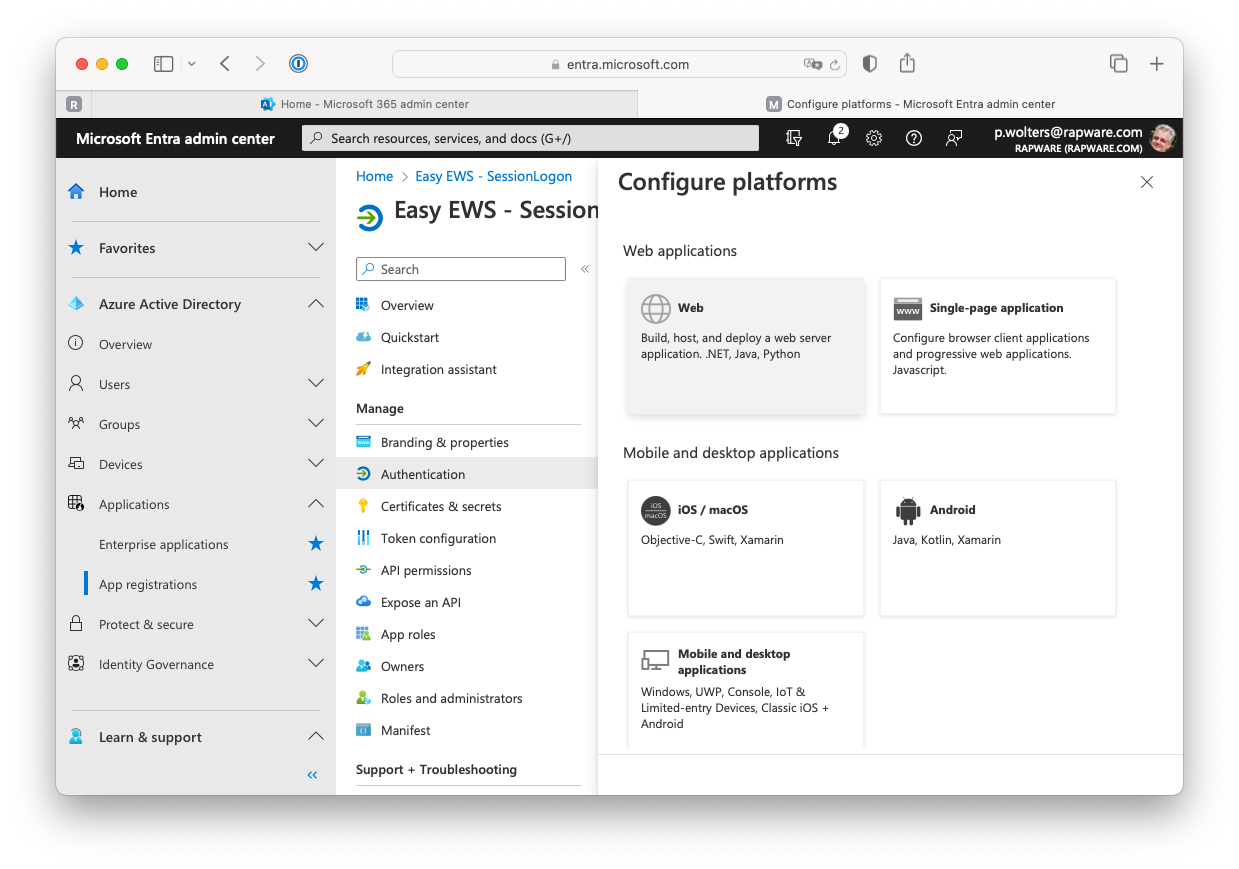
Setting up a redirect URL
17) The "Authorize" grant will use a browser to request the user credentials in order logon. In order for this to work you will have to setup a "Redirect URI". This is an url which is used by Easy EWS to show the credentials page.
In order to set this up you must navigate to the "Overview" page and select the "Authentication" tab.

18) Press the "+ Add a platform" button and select the "Web" platform.
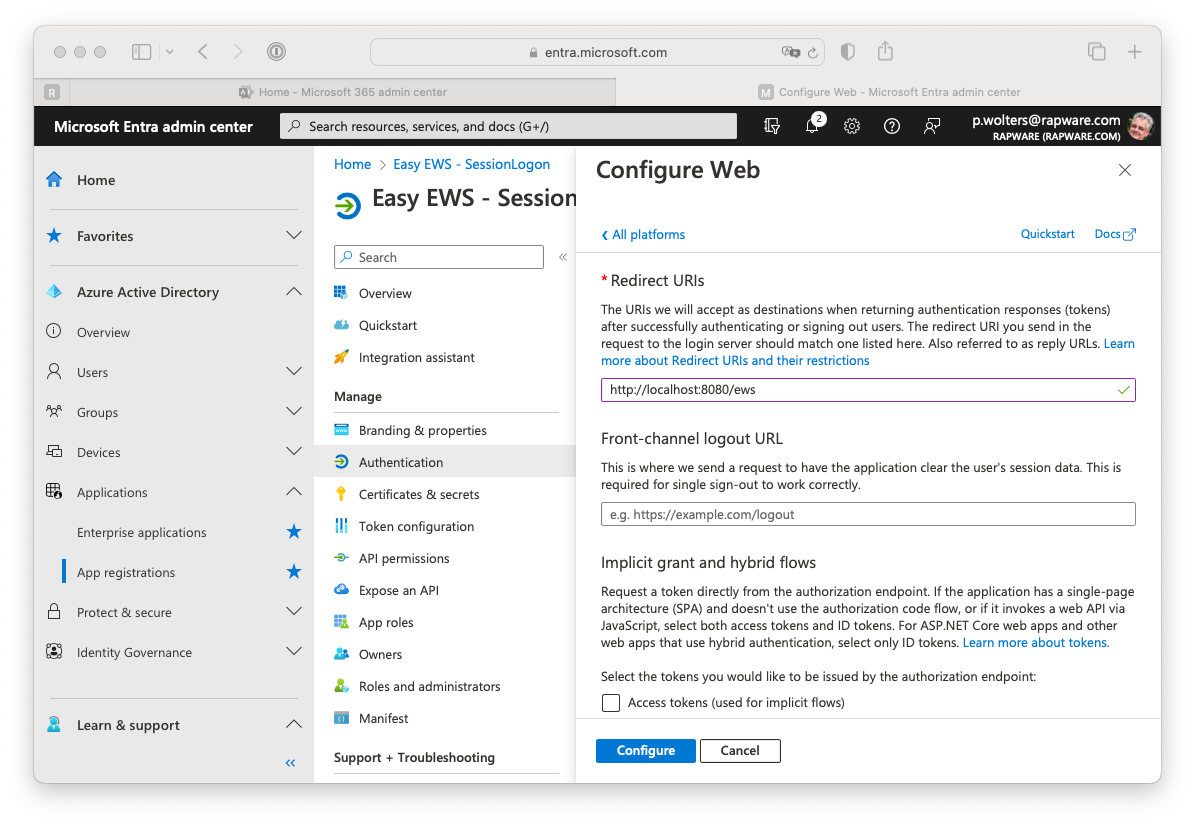
19) Use "http://localhost:8080/ews" (or http://localhost/ews) as URI and press the "Configure" button to apply the value
Done
20) You can now logof from the Azure and Microsoft 365 portals and use the values you saved in your Easy EWS application to logon.